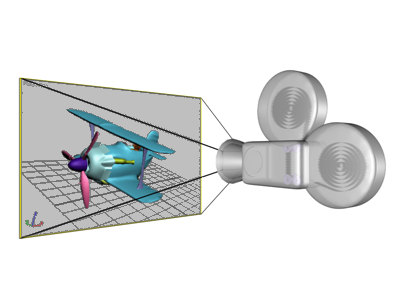
Cameras

Information
The information below is based on 3D Studio Max 7.
There are two types of cameras:
- Free camera
A Free camera has a single icon to animate. Free cameras are easier to use when the camera's position is animated along a path. - Target camera
A Target camera has two icons to animate, the target and the camera. Target cameras always face their target. The camera and the camera target can be animated independently, so target cameras are easier to use when the camera does not move along a path.
Free camera
- On the Create panel
, turn on Cameras
- On the Object Type rollout, click Free.
- In the Top viewport, click to place the camera icon.
The camera direction is directly away from you. Clicking the Top viewport aims the camera downward, clicking the Front viewport aims the camera at the scene from the front, and so on.
Clicking in a Perspective, User, Light, or Camera viewport aims the free camera downward, along the negative Z axis of the World Coordinate System. - In the Parameters roll out, change the Field of View (FOV) parameter to in- or decrease the camera's field of view.
You can also use the preset values in the Stock Lenses group, click a button to choose a stock focal length. A 50mm lens will give you the equivalent field of view of the human eye. Focal lengths shorter than 50mm will give a wide angle view and focal lengths longer than 50mm will give a telephoto view. - Turn on Show Cone.
The camera's cone is now visible even if the camera object is not selected. The camera's field-of-view cone appears outlined in light blue. - Turn on Show Horizon.
The camera's horizon line is now visible, a dark gray line appears at the level of the horizon in the camera's viewport. - Turn on Environment Ranges.
Environment ranges determine the near and far range limits for atmospheric effects you set in the Environment dialog. - Turn on Clipping Planes.
Clipping planes let you exclude some of a scene's geometry to view or render only certain portions of the scene. Objects closer than the near clipping plane or farther than the far clipping plane are invisible to the camera. The location of each clipping plane is measured along the camera's line of sight (its local Z axis) in the current units for the scene. In viewports, clipping planes are displayed as red rectangles (with diagonals) within the camera's cone.
- On the Create panel
, turn on Cameras
- On the Object Type rollout, click Target.
- In the Top viewport, click to place the camera icon, then drag toward the center of the object. Release the mouse button to set the target point.
- Right-click the Perspective viewport to make it active, then press the C key on the keyboard. This is a keyboard shortcut for Camera View. The Perspective viewport is replaced with the Camera Viewport. Notice in the bottom right that the Viewport navigation controls have changed. There are different controls for cameras than for the Perspective viewport. The viewport now shows what the camera "sees".
- Use the Truck Camera button
to move the camera so the object is no longer cut off in the viewport.
- Use the Dolly Camera button
to zoom in to better view the object.
- To see the object from a bird's eye perspective, use the Orbit camera button
in the viewport navigation controls. Watch the other viewports to observe the movement of the camera in space.
Tip: To undo cameras in the Camera Viewport, press CTRL+Z rather than SHIFT+Z. - In the Parameters roll out you can change several values, see Free camera.
- Select the Camera by pressing the H on the keyboard, then choose Camera from the list.
- On the Modify panel
, goto the Parameters rollout and locate the Type: field. Click the drop-down arrow and choose Free Camera.
- Select the Camera by pressing the H on the keyboard, then choose Camera from the list.
- On the Modify panel
, goto the Parameters rollout and locate the Type: field. Click the drop-down arrow and choose Target Camera.
- To set the target, press the H on the keyboard, then choose CameraXX.Target from the list. Press button Select and Move
to position the target.

ConversionConversion EmoticonEmoticon